Row 2. Sl 1, k2 tog, k31, sl 1, k2tog, psso, k31, k2tog, p1.
The beginning and ending stitches form an edge chain which is really important for picking up stitches as each module is knit.
The triangle reduces with each right side decreases until five stitches remain, and those are bound off. Then I can measure the bottom width and determine the finished size of the garment. I am using two different weight yarns, so this is really the only way to find out what the combo will do. If I don't like it, it isn't much to rip out. Mostly experience has told me that it will be pleasing.
So measuring might tell me that the triangle is 10 inches wide, and that means the width of the finished product will be 40", before blocking. If I am making a cardigan, I will add a button band on the front which will bring in at least another inch, so that is part of the final size.


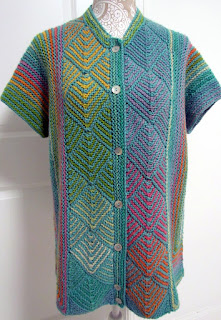
 In other designs, I might make a vertical set of diamonds, without starting with a bottom triangle, and add little edge triangles later. Such is the case with the Diamond Panel jackets and vests. The string of diamonds are knit first, front and back and then the sides are picked up and knit to the desired width. In that case gauge tells me how many stitches I will need to make the necessary width.
 An easy project to try this idea is the scarf. And it is a great use of leftover bits of yarn. Try it with worsted weight and a size 8 needle.
After the triangle is knit, pick up stitches along one side and decrease at the bottom while increasing on the top (right side only) and that will keep the diagonal going. Knit to desired length and then go back to the center triangle, pick up those edge stitches and again, decrease at the bottom while increasing at the top.
FYI. I may start out with a plan but sometimes the whole thing takes on a life of its own. I am just along for the ride!


Thanks, Melody, for the clear instructions. Your knitting is beautiful!
ReplyDeleteThis comment has been removed by a blog administrator.
ReplyDelete